If the honey bee colony for some reason loses the queen or the beekeeper gets rid of her on purpose, the bees will tend to make a new queen as soon as possible.
The bees can make a new queen if there are eggs and/or young larvae up to three days old. Bees will start making a new queen cells (emergency queen cells) as soon as they realize that there is no queen in the hive.
To learn more about queen cells go to: Queen Cells, and Three Kinds Of Queen Cells.
Queen cells during the dearth
If there is no honey flow, you should feed the colony.
The colony should be fed every other evening with 1l of sugar water in a 1 to 1 ratio.
Advertisement :
Beekeeping for Beginners
Everything you need to know!
This is a full beekeeping course for beginners.
The queens made out of older larvae
If the colony doesn’t make a new queen bee soon, it is doomed because there is no new brood which means that the number of bees in the hive will decrease.
Because of the urgency of the situation and the need for the colony to make a queen as soon as possible, the bees usually start to feed (with royal jelly) the older larvae as well (but not the ones older than 3 days). These queens tend to emerge sooner than the queens from younger larvae.
However, these ones are of lower quality because they weren't treated from the first day as the future queens. In their first days they were nurtured and fed as future worker bees. These queens are slightly smaller and less productive than the queens which developed from larvae that was nurtured and fed from the start with the intent to become queens.
The queens made of older bee larvae are less productive than the queens made of the youngest larvae.
The first one to emerge will be the queen developed from the oldest larvae. You want your queen bee to be as good as possible and that is why you don't want to risk your future queen to develop from older larva.
Because of this, it is important for the beekeeper to check all the queen cells and to choose the good ones – those with young larvae, and to destroy the ones that are not so good so there won't be any bad queens. This should be done four days after the hive has become queenless.
If you don't know when exactly the hive became queenless
If the beekeeper himself removes the queen from the beehive, he knows exactly when the four days have passed since the colony has become queenless.
However, it is possible for the bee colony to loose her without the beekeeper knowing it. During the hive inspection, he would find out the emergency queen cells. For example, the queen bee was accidentally squished during the last inspection, something happened to her or the bees killed her themselves for some reason. In that case you cannot be sure when exactly that happened and thus when four days have passed.
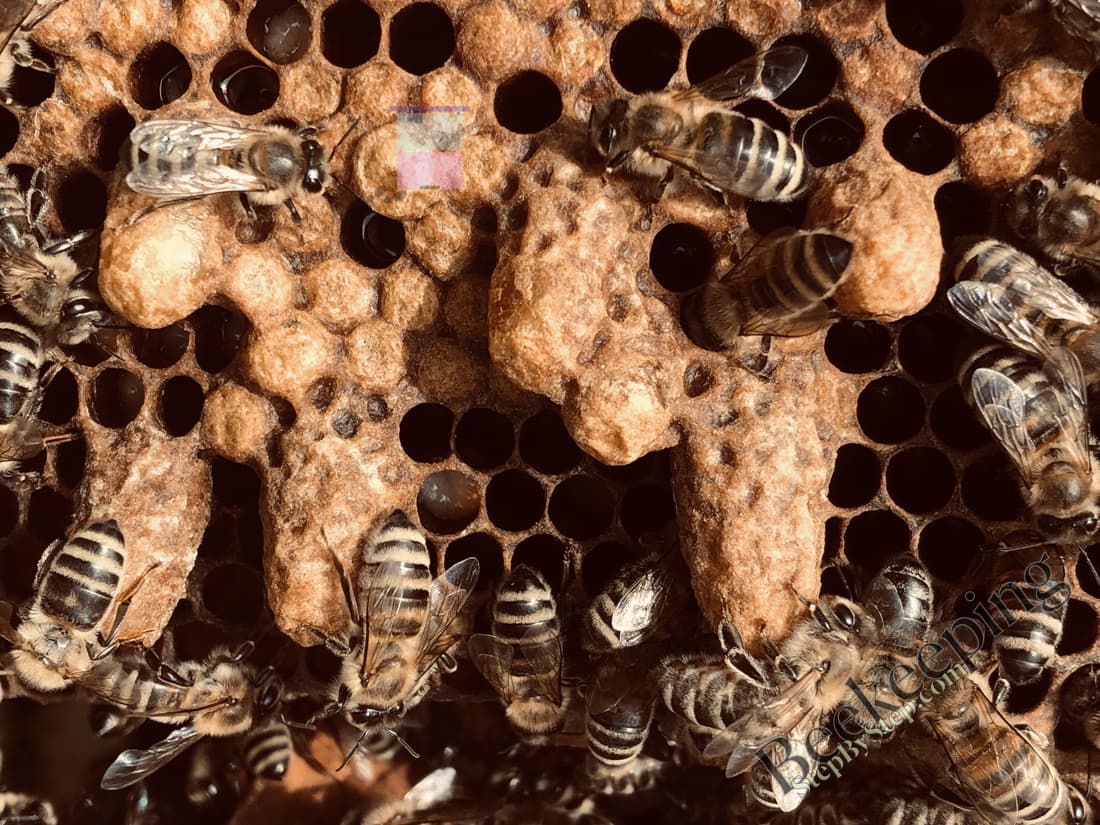
In that case, if there are both closed and open queen cells – the closed ones are from older larvae, so they need to be destroyed.
Even so, what if they are all closed?
In that case it is hard to distinguish which queen cells are from older larvae.
Instead of that, you should choose a few (at least 2) the biggest and best looking queen cells, from the middle and the top of the frame (because the temperature can be slightly better there) and destroy the smallest and not good looking queen cells with your hive tool. Except for this difference the steps are the same as the steps that should be done on the fourth day since queen removal and which are described in detail below on this page.
More experienced beekeepers can identify older queen cells by rough pattern on their surface, while the younger ones are smoother. The older queen cells will be the ones started from older larvae.
The fourth day after queen removal – choosing the good queen cells - steps
Beekeeping equipment you will need:
- Beekeeping suite
- Beekeeping gloves
- Beekeeping smoker
- Hive tool
- Soft beekeeping brush
Leaving only the best queen cells – step by step:
1Open the beehive. Queen cells can be found wherever there is brood.
2Destroy queen cells witch are not good - using the hive tool destroy all the closed queen cells and the opened ones with big larvae. Leave only the best looking queen cells - with the smallest larvae. You should leave at least two queen cells.
1Take out the first frame on one end of the beehive, check if there are queen cells on it. Usually there aren't any. But if there are some, check them and destroy the bad ones. Lean that frame on the front side of the beehive.
2Take out the next frame and closely look if there are queen cells on it.
The bees usually cover the queen cells with their bodies so you can easily miss some queen cells. Using your finger or beekeeping brush gently move the bees if you can't see what is under them.
3Using the hive tool destroy all of the queen cells that are already closed.
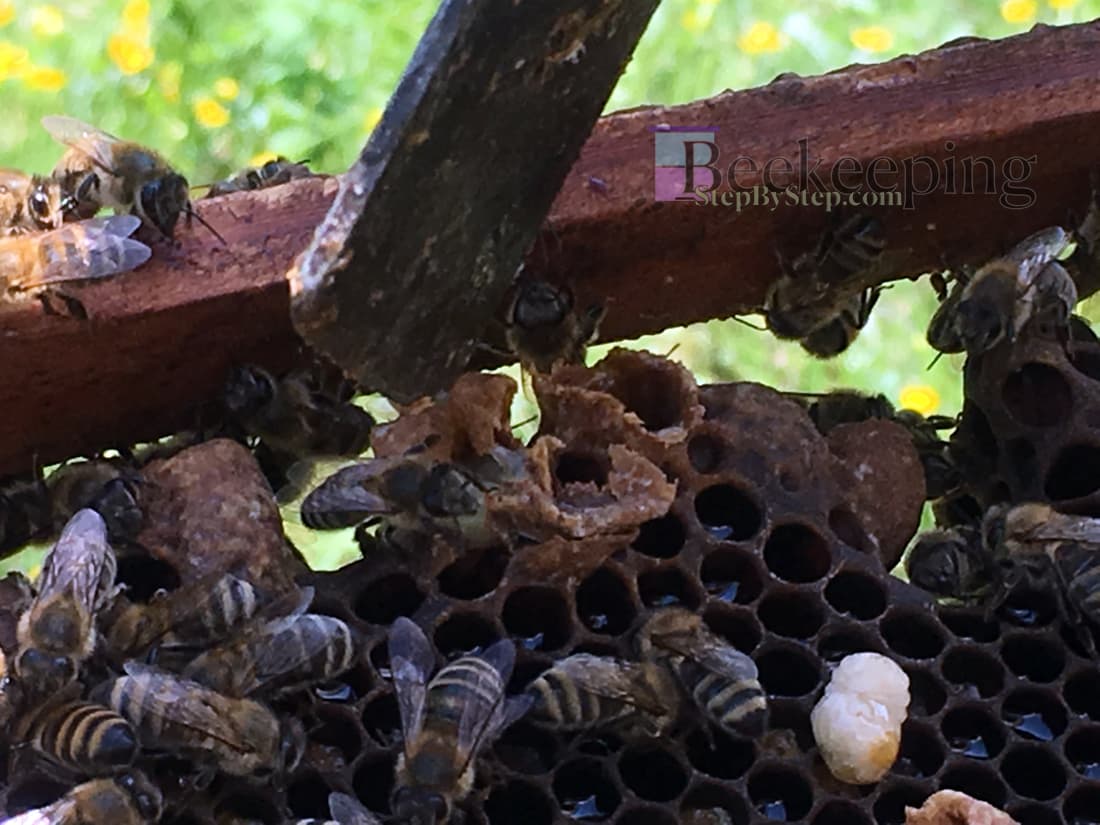
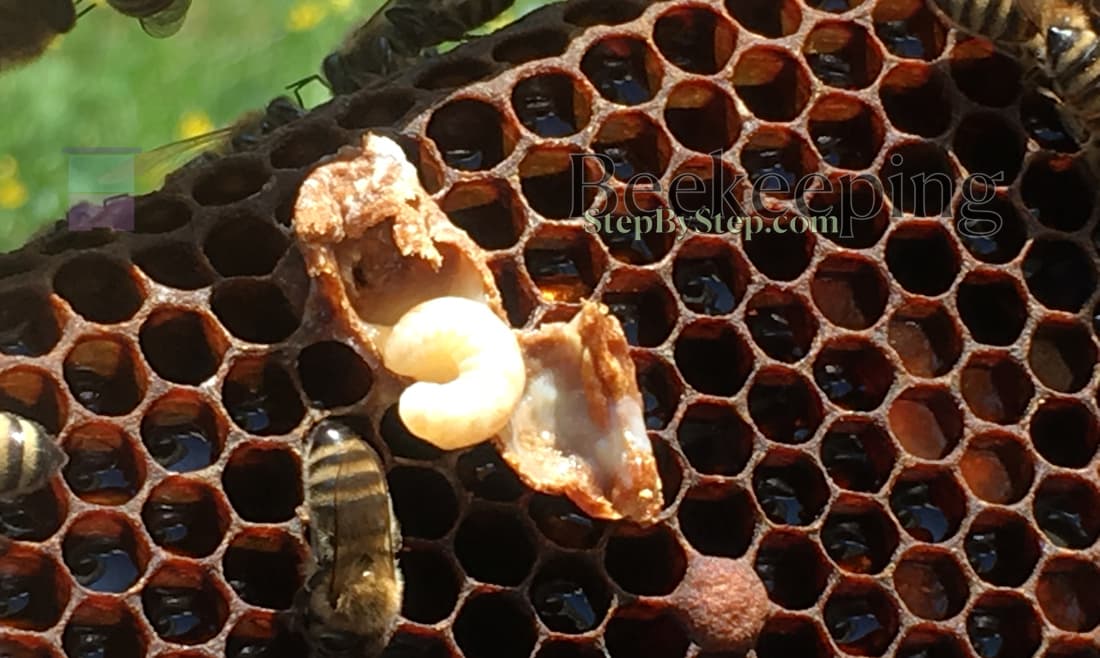
4Look from beneath into the open queen cells and destroy the ones with big larvae and all of the queen cells that you don't like for any reason.
5Leave the ones with small larvae and a lot of royal jelly.
The queen cells you left should be good looking, with small larvae and lots of royal jelly (the best place would be in the middle or at the top of the frame because of the most appropriate temperature there).
6Return that frame to the beehive. Return the frame on the place of the previous frame so you always have some space to work with the next one.
7Repeat the steps 2to 6with other frames, and if the hive has two brood boxes repeat the same steps on the lower brood box - and on all the boxes where there is any brood (if the queen also laid in the honey supper, those frames need to be checked as well).
3Close the hive (don’t forget the first frame you leaned on the front side of the beehive) and don't open it in the next 20 days.
☀️ After 20-30 days open the beehive and check whether the young queen started laying eggs.
Follow the instructions in - Basic Hive Inspection.